Appearance
Mugshot Bot Manual
Guide to adding Mugshots to your website
Default static Mugshot
Once you have created your free account, you can customize your own Mugshot on mugshotbot.com/customize, which you can later use as a link preview for your website. As a first step, you can choose from a variety of different themes, color schemes, colors and background patterns, which you can mix and match to generate the Mugshot most fitting for you. Depending on the chosen theme, you can also upload an image directly to Mugshot Bot, which will then be used in your link preview.
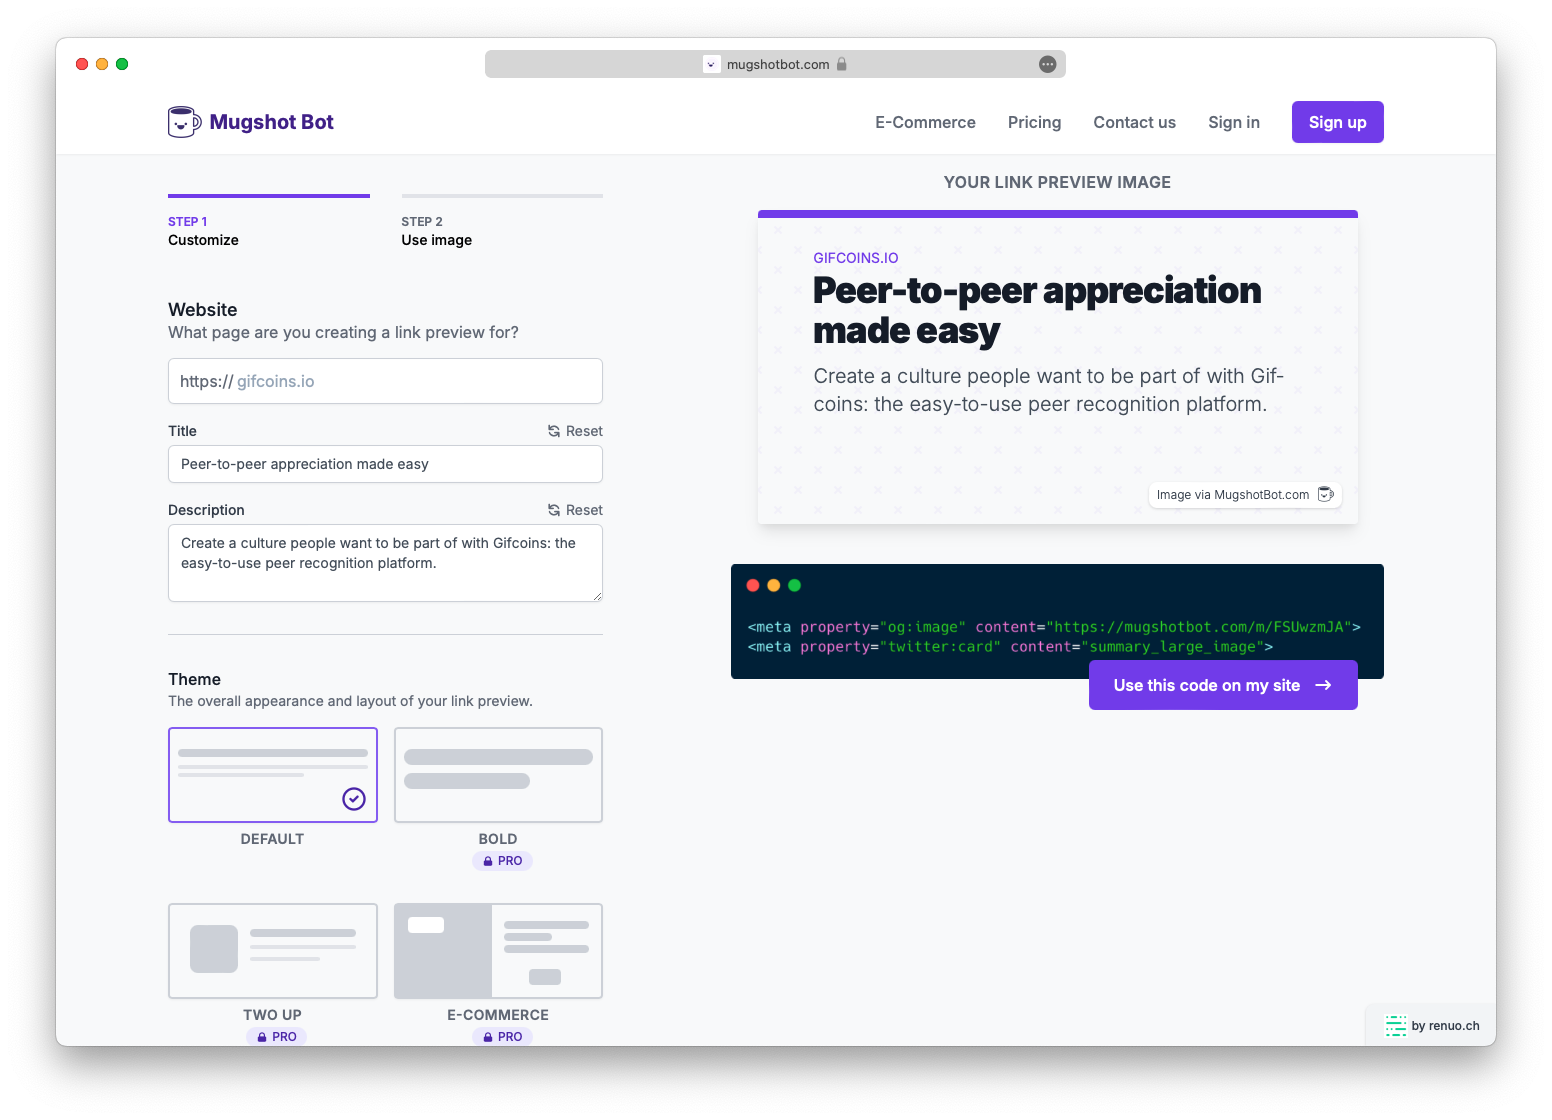
For default static Mugshots which are supposed to remain the same on every page (where you want them to appear), the dynamic image code can be safely ignored, as it is not needed in the head of your html. This code is only used in the case where the images are to be selected dynamically. We will revisit this topic later on in the guide (Dynamic Mugshot).
As soon as you have found the perfect combination for your use case, you can move on to the second step, where you will be presented with three different options to add the link preview to your page.
Adding it manually (Download the image)
The generated Mugshot can be downloaded manually and imported into your image folder / storage together with all of your other images that you’re currently using on your website. Once you have done this, you can add the following tags to the head of your html to enable your newly created link preview:
html
<meta property="og:image" content="https://yourdomain.com/your_image.png">
<meta property="twitter:card" content="summary_large_image">
Make sure to replace the content link https://yourdomain.com/your_image.png with the URL to the newly imported Mugshot.
Adding it by Copy-Pasting a URL (Mugshot Bot CDN)
Mugshot Bot can also host your Mugshots, saving you time and labor by skipping any manual downloads. The generated code doesn’t change too much from the example before - except for the link which will now point to the Mugshot Bot CDN:
html
<meta property="og:image" content="https://mugshotbot.com/m/your_identifier">
<meta property="twitter:card" content="summary_large_image">
Your identifier in this case would be the one you see on the Step 2 page, after you have created your design.
Create dynamic previews automatically
Choose this option, if you don’t want to create a preview for each page separately. Follow this guide to implement your design once and let Mugshotbot do its magic for every page or product on your website. For this topic, we dedicate the entire next chapter in order to offer a detailed overview of which attributes can be dynamically changed and how to do this. Buckle up to achieve fully dynamic previews for your website, you might need a bit more programming knowledge than in the other two steps. But don’t worry, grab a cup of coffee and let's get into it.
Dynamic Mugshot
Link previews can also be created dynamically using additional meta-tags or request parameters that can be parsed by Mugshot Bot. A potential use case for such links are the product detail pages - nobody wants to manually generate and save Mugshots for each and every product they have on offer. To enable as much flexibility as possible and to avoid going through a tedious manual process, almost all of the Mugshot attributes can be set dynamically which results in a Mugshot generated on the fly. In the next couple of sections, all of the available attributes and their corresponding meta-tags will be shortly presented, followed by an example implementation, which also presents the available request parameters that can be used instead of the meta-tags.
Title
Every product has its own (unique) name, which should definitely be represented in the link preview, for example by setting it as the title. This title can be dynamically set by adding a mugshot:title meta-tag in the head of the html, like this:
html
<meta property="mugshot:title" content="Product Title">Additionally, Mugshot Bot also looks for an og:title meta-tag or a title tag as a fallback in case there is no mugshot:title meta-tag present (with each being less specific) and uses its content for the dynamic generation:
html
<meta property="og:title" content="Product Title">
<title>Product Title</title>
Don’t forget to change the content to your product’s name!
Description
Just like the title, the description can also be set dynamically according to the product that you’re willing to create a link preview for, by using the mugshot:description meta-tag:
html
<meta property="mugshot:description" content="Product Description">Mugshot Bot also checks for these tags to use as a fallback in case there is no mugshot:description meta-tag to be found:
html
<meta property="og:description" content="Product Description">
<meta name="description" content="Product Description">
Price
After reading this far, we think that you’ve slowly gotten the gist of it. For dynamically setting the price, the following meta-tag can be used:
html
<meta property="mugshot:price" content="Product Price">Discounted price
The discounted price, in case the product you’re generating a Mugshot for is currently being offered at a discount, can also be set dynamically:
html
<meta property="mugshot:discounted_price" content="Discounted Product Price">Image
Finally, when using the Two Up or E-Commerce themes, you have the option to upload an image for your link preview. To dynamically set the image to one of the product specific ones, simply use the following meta-tag and replace the content with a valid URL which leads to your desired image:
html
<meta property="mugshot:image" content="https://yourdomain.com/your_image.png">Caution
If you wish to access the example code for the dynamic generation, you need to leave the following attributes blank (a.k.a. not customize them in Step 1): title, description, price and discounted price. As long as the corresponding meta-tags have been included in the head of the html and they don’t conflict with other tags, they will be used to generate the Mugshot dynamically.
Once there are no custom values set for the aforementioned attributes, you can move on to Step 2, where you will see a code snippet like the following:
html
<meta property="og:image" content="https://mugshotbot.com/m?color=green&image=7f47e811&mode=light&pattern=lines_in_motion&theme=e_commerce&url=https://gifcoins.io">
<meta property="twitter:card" content="summary_large_image">
Not very different from the default static Mugshot code, is it? That’s because it’s supposed to be simple! The only difference is that there is no more Mugshot identifier. Instead, additional request parameters are used to tell Mugshot Bot how the link preview should look like. Additionally, should you not wish to work with the meta-tags presented in the past sections, the attributes can also be set via request parameters. Thus, these parameters can be split into two groups.
General / Styling parameters
- theme: This is the theme of the Mugshot. Available options are:
- default
- bold
- two_up
- e_commerce
- mode: By default the mode is set to light. Use dark if you would like your link previews to be dark mode
- color: The accent color of the link preview. Can either be one of the standard colors presented in Step 1 or a hexadecimal code (omitting the #)
- pattern: This is the background pattern that is to be used on the Mugshot. Available options are:
- none
- hideout
- bubbles
- texture
- diagonal_lines
- charlie_brown
- lines_in_motion
- topography
- bank_note
- hide_watermark: Can be either true or false and tells Mugshot Bot to hide the watermark
- language: This is the language indication for the link preview
- url: This URL indicates to which page the Mugshot belongs to
You don’t want to use Meta Tags? Use content parameters
- title: This parameter is used to set the title of the Mugshot
- description: Analogue to the title, this parameter is used to define the description of the Mugshot
- image: A code to an image that has been uploaded directly to Mugshot Bot. You can access all your uploaded images as well as their corresponding codes by going to Step 1 and clicking on Change under Image
- remote_image_url: If your image is already available on the web under some URL, you can set this parameter to said link and Mugshot Bot will fetch the image from there
- price: If you use the E-Commerce theme and want to display a price in your link preview, you should use this parameter to define it
- discounted_price: Similarly to the price, if you are currently offering some kind of discount on a certain product, you can use this parameter to define it. Mugshot Bot will take care of displaying both prices to better visualize the rebate.
Phew! That was quite the list. We all know that examples are the best way to visualize something, so let’s take a look at one to summarize everything that we’ve seen until now. Let’s assume we have the following Mugshot:
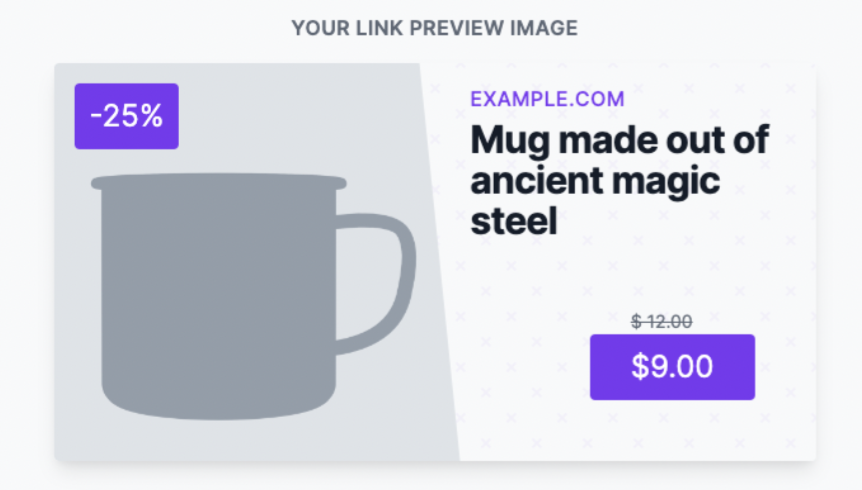
To display this Mugshot as a preview to your page, you would have to add something along the lines of the following code to the head of your html:
html
<meta property="og:image" content="https://mugshotbot.com/m?color=purple&image=7f47e811&mode=light&pattern=hideout&theme=e_commerce&url=https://example.com">
<meta property="twitter:card" content="summary_large_image">
<meta property="mugshot:price" content="$12.00">
<meta property="mugshot:discounted_price" content="$9.00">
Alternatively, you can set both the price and the discounted price as request parameters should you not want any additional meta-tags in your head. In this case, the code would look something like this:
html
<meta property="og:image" content="https://mugshotbot.com/m?color=purple&image=7f47e811&price=$12.00&discounted_price=$9.00&mode=light&pattern=hideout&theme=e_commerce&url=https://example.com">
<meta property="twitter:card" content="summary_large_image">
Notice the two extra request parameters price and discounted_price that have replaced the meta-tags.
This concludes this guide on how Mugshot Bot works. We hope we could clarify things a bit and if you have any questions regarding your implementation, don’t hesitate to write an email to [email protected].